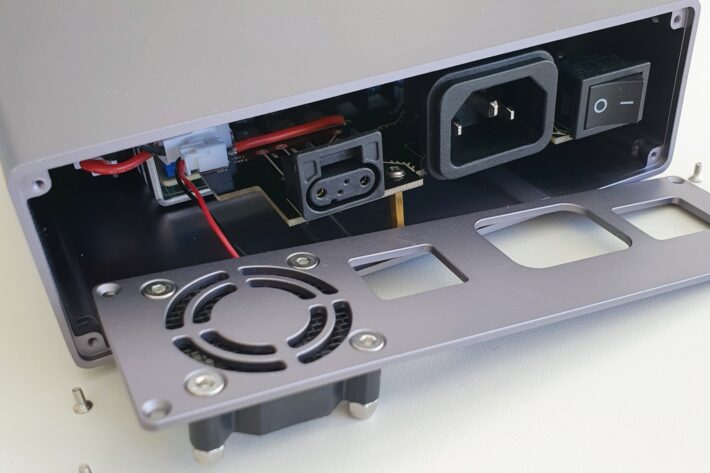
In this project, I guide you through the exact steps that i took to solve the issue of fan noise coming from the power supply of my Snapmaker 2.0 A350. It takes a bit of tinkering and a few spare parts, but the reduced noise is completely worth it!
Since I received my Snapmaker 2.0 A350, I have been both thrilled and horrified. The Snapmaker 2.0 is the ultimate DIY tool for makers, but you need to do a bit of tweaking to iron out a few flaws. Fortunately this is not so hard, and you even have your new 3D printer to help with the necessary upgrades and modifications. One of the first ones you want to do, is to fic the loud noise coming from the power supply fan.
This project is one of several projects focusing on upgrading and improving my Snapmaker 2.0 A350, and is also part of my [Solved] series.
You can find the complete list of my Snapmaker upgrades and mods here…
The primary reason for the loud noise is the exhaust fan of the Snapmaker power supply. The exhaust fan is very small, so to get enough air flow to cool the power supply, Snapmaker has chosen a fast but extremely loud fan. If you have a workshop or an unused room where you can place the snapmaker and don´t care about the noise, you are probably okay with the noise power supply. However, if you have the Snapmaker in the same room as yourself (like me), you will positively go insane from the loud fan noise.
The fix for the loud noise is simply to replace the fan with a less noisy one. This will probably void your warranty, so you should think twice before you take on this project yourself. Others are hoping for the loud noise to be fixed with a software update, but as this is an issue caused by poor choice of hardware, I personally do not find such a solution feasible.
I have been extremely happy that I did this small modification. Now I can actually hear my Snapmaker making 3D-printing noise (which is to be expected), since it is no longer the loud fan making the most noise.
For this project, you will need to get the following items:
- 1 less noisy fan – 24V DC 40x20mm
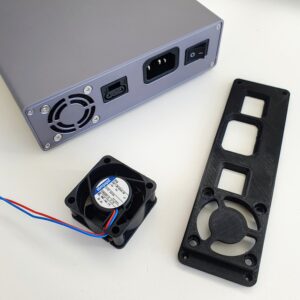
Make sure you get a high quality one, with good air flow.
I bought the industrial grade ebmpapst 414 24V fan, as I wanted to make sure that my new fan would be able to handle extensive use for a long time. - 1 JST-XH female 2-pin plug, if your new fan has another or no plug
I had some black Dupont connectors from another project, which can also be used, although it’s not the correct way to do it… - A new backplate for your power supply to fit the larger 20mm deep fan. You can just 3D-print it yourself. I used this nice free design.
Furthermore, you will likely need a soldering station, unless your fan comes with the right plug attached already.
Once you have the necessary items ready, follow these steps to rid yourself of the noise from the Snapmaker power supply fan.
1. Unplug power
Make sure that the power supply is completely disconnected from both the power outlet and your Snapmaker 3D printer. Otherwise you might get hurt, or the printer could get fried.
2. Remove backplate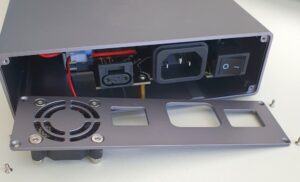
Remove the four small philips head screws at the corners of the backplate of the power supply to detach the back plate with the fan attached to it.
Carefully reach into the snapmaker power s sure to carefully reach in and safely unplug the small white plug for the fan power, allowing you to completely remove the back plate and the noisy fan. Save these, just in case.
3. Prepare new fan plug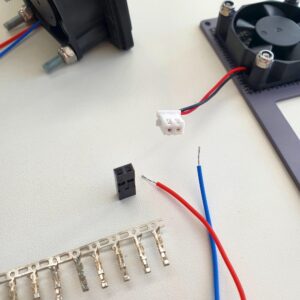
Make sure that your new fan has the right plug. If not, replace or attach the right plug, allowing you to plug the new fan into the same plug that the old fan used. The white plug in the image is the correct one, but the black ones can be used if you just happen to have them lying around, like me.
Pay close attention to the polarity and make sure that the red cable goes on the same side as the original fan, if you have a plug that can be plugged in one orientation only (this type of plug is probably safest, so you dont risk plugging it wrong by mistake later).
4. Attach new fan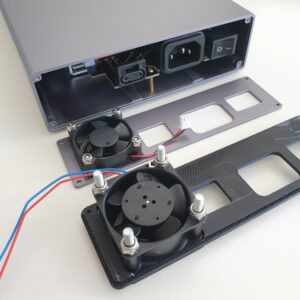
Attach your new fan to the new 3D printed back plate, using the four screws and the locking nuts. Depending on your fan, you may want to use some washers as well.
NOTE: Make sure that the airflow of the fan is correct when you mount the fan! The airflow should blow air out of the power supply, not into it! Usually, the airflow is indicated on the side of the fan with a small arrow.
5. Plug in new fan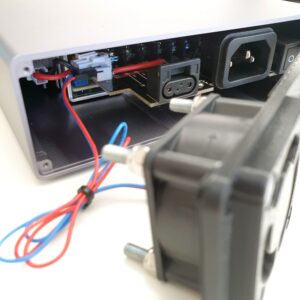
Connect your new fan to the plug inside the power supply, where you previously removed plug for the original noisy fan.
NOTE: Make sure that you get the polarity right! Especially if you attached the plug yourself, but some fans that come with a plug already attached may also need to have the polarity switched. If in doubt, take a look at the original noisy fan, and how the black and red wires were oriented when plugged into the power supply.
6. Tidy up cables
Tidy the fan cable so you are sure that it will not get stuck in the fan, blocking it from turning. Then neatly slide the fan into the power supply, as you attach the new back plate to the power supply.
NOTE: make sure that the fan and screws does not touch any of the circitry inside the power supply! This could be catastrophic and break the power supply!
7. Close it up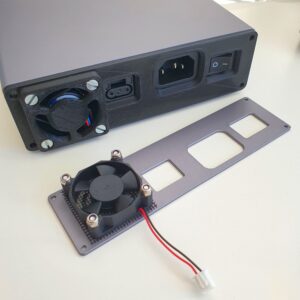
Re-attach the four screws in the corners of the back plate, while making sure that the plugs and on/off switch fits neatly into the holes of the new back-plate. If they do not fit, the tolerances of your 3D printed backplate might be a bit off. Cut the holes a bit bigger, rather than just forcing it on.
You can now plug the power supply into a wall outlet and turn it on. Verify that the new fan is spinning, and that it is blowing air out of the power supply, not pulling it in. Once you have verified that it is working, power it off again, before you hook it up to your Snapmaker.
Congratulations! The snapmaker power supply fan is no longer the most noisy part of your 3D printer!
Actually, there is another fan inside the power supply, but since this is nowhere near as loud as the one we just replaced, I haven’t bothered to replace it yet.
How did this project go for you?
Which fan did you choose, and can you recommend it to others?
Please let me know in the comments below!
